More Work!
Finally some of the work from the past 6 months is going to print and I am starting to be able to publish them. Today I am posting up some card art for AEG's Nightfall game that I did for them back in March.
Cheers!
Wednesday, August 22, 2012
Tuesday, August 21, 2012
Glorantha
Hey all, It has been awhile I know but June/ July were very busy months and I'm only now starting to get back on track with updating my blog etc. I've had some pretty exciting gigs including a Cover assignment for AEG and some Interior work for Green Ronin's upcoming Night's Watch module for their Song of Ice and Fire RPG Campaign Setting. Once the products go live I'll be able to post them here but in the meantime, I did get permission from my AD Jeff Richard over at Moon Design Publications to post some of my recent work for their Glorantha RPG setting. When I started this assignment I hadn't realized that the characters and setting had been around for over 30 years and it was really cool to be able to take a stab at putting my own stamp on this classic IP.
So without further Adieu..
#1 Immolation and Apotheosis:
#2: Harrek and Gunda the Guilty:
#3: Sacrifice to Seven-Headed Arkat:

#4: The Court of King Guilmarn:

#5:Lunar triumphal procession:
So without further Adieu..
#1 Immolation and Apotheosis:
#2: Harrek and Gunda the Guilty:
#3: Sacrifice to Seven-Headed Arkat:

#4: The Court of King Guilmarn:

#5:Lunar triumphal procession:
Friday, June 1, 2012
Back to Basics Part 2
This post is an extension of my last one and this time I am posting up my Pencil work. I love drawing with a bic pen and most of my sketches and studies are executed with that tool but I was feeling out of practice with using a pencil. So, here we go with more studies, this time using a different tool. There are several Nudes in this post so if you have a problem with it, I suggest that you look away ;)
Labels:
figure drawing,
Head Drawings,
Pencil,
Reilly Method,
Riley Method,
Sketchbook,
Sketches,
studies
Back to Basics
For the last year or so I have worked almost exclusively digitally and recently, I was given an assignment whereby I had to actually draw using traditional tools. What a novel idea! All joking aside, at the time I felt Rusty and it took some time to get into a rythm with my tools. Now combine this rustiness and with the fact that I have been spending a lot of time working on more graphic based illustrations, I was having one of those " I can't Draw" moments. All of us go through this to one extent or another and for me, the only cure is to go back to the basics and do some figure drawing. Today, I am posting a ton of figure work that I have put together over the last little while between gigs and as warm ups. If any of you out there in blog land go through the same type of illustrators block, I highly reccomend that you do the same and in addition, try to make it part of your daily routine to warm up and get your juices flowing. Like with any skill, if you don't use it, you lose it.
Ok, enough with the lecture. On with the drawings. I can tell by my stat counter that many of my visitors get here because they google the term "Reilly Method" or some approximation of the same spelling. To be honest, I'm not even sure what is the proper method to spell the name. Reily, Riley, Rielly ?... Since I discovered this method of quick drawing through Chris Legaspi's blog " Fresh Designer", I've been hooked and it has had a tremendous impact on the way I draw. Prior to that, I was very much a student of the Loomis school which I think compliments Reilly nicely. I tend to start my drawing with several quick head sketches or figures in the using the reilly method to quickly block in the forms and later in my session, I move to a " Loomis" approach to execute a longer and more finished study. None of my studies are taken all the way through to a highly polished result. For me, I draw for pleasure and to study the individual from my reference and not to end up with a gallery piece. That being said, I recognize that I could benefit from some long poses and new material for my portfolio. Anyways, I am posting several pages of my sketches starting with the Reilly method style and then I will have another post for my pencil work.
Labels:
figure drawing,
Pen Drawing,
Portrait,
quick Sketch,
Reilly Method,
Riley Method,
Sketchbook,
studies
Friday, May 25, 2012
Painting from a Black and White Photo
Recently, I finished a private commission for the Sweetland Family which was a portrait of Mr. Sweetland's father who served as an aircraft Mechanic during the 2nd world war. This is actually part 2 of a series of paintings that I have done for the family, the first being a portrait of the other family member who served in the Canadian Army during the first word war. So, when the client approached me for this second piece, I was already familiar with them and they with me which made the process much easier and more fluid. This Blog post is my attempt at explaining my process on how I was able to translate a black and white photo into a finished illustration based upon my clients request.
Initially, the client came to me with a couple of old photos and asked that I paint a portrait of the individual which would tell the story of his wartime service.
3 Photos
Cropped and enlarged photo that I ended up using.
That was it. Through a couple of meetings with the client I was able to establish more about his character, that he was an engine mechanic in the RAF during the war before he emigrated to Canada. Armed with that information, I created a couple of thumbnail comps which I then showed to the client to represent my ideas for this piece. After a bit if deliberation, the client settled on comp #2 and I then moved forward with the painting.
The first piece in this series was executed almost 8 years ago in gouache on 18"x20" Arches Water color paper. This time around, I wanted the piece to be of the same dimensions to match yet I now work almost exclusively digitally which meant that the final image was going to be printed, most likely on canvas.
Pencils:A drawing of the main figure
Flats: Knocking in some basic color to help me get my bearings
Adding in Other Compositional Elements. Just for you WW2 buffs out there, you might recognize the Lancaster Bomber and the Merlin Engine.
Modelling The Bomber
Detailing the Bomber and modelling the forms on the Engine and Main Character
Modelling the Main Character's portrait and more detailing
Final Version:
Close up of head and Bomber Nose.
Once the piece was completed, I accompanied the client to a local digital printer and we got the image printed on Canvas.
All together I'd say I spent about 30 hours or so on this piece. If you have any questions or comments on how I completed this image, please feel free to make a comment below.
Thanks for stopping by.
Here's an image of the image in it's new home and another satisfied client.
Sunday, May 6, 2012
Hey Gang,
Today we have a small sampling of some sketch cards I did for Breygent marketing on their Warlord of Mars Lineup.
These would be my top 10.
Enjoy.
You can see a few more posted on Breygents facebook page here
Tuesday, April 24, 2012
Hey Gang,
It's been a while and I've been busy! I'll try to keep this brief but what I have for you today are some paintings I did for Alderac Entertainment Group for some of their products. I can't say which ones and I've omitted some illustration elements but I am publishing these images with permission from my AD Jeff Quick. So here Goes.
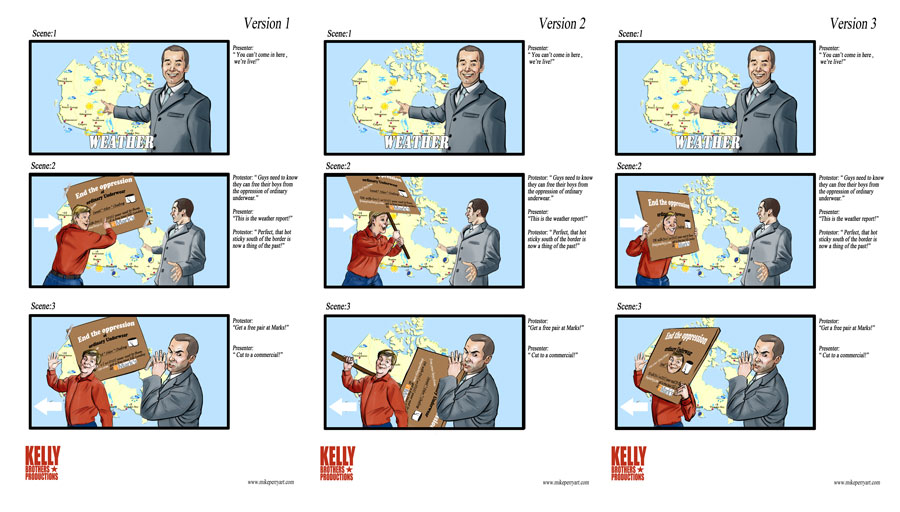
Additionally, I'm posting up a storyboard sequence I completed for a Mark's commercial. The idea was to present multiple ways that the story could be presented with only using 2 actors.
Ps: What's the deal with the new blogger format? Just when you get used to something they change it!
Subscribe to:
Posts (Atom)